Home Assistant
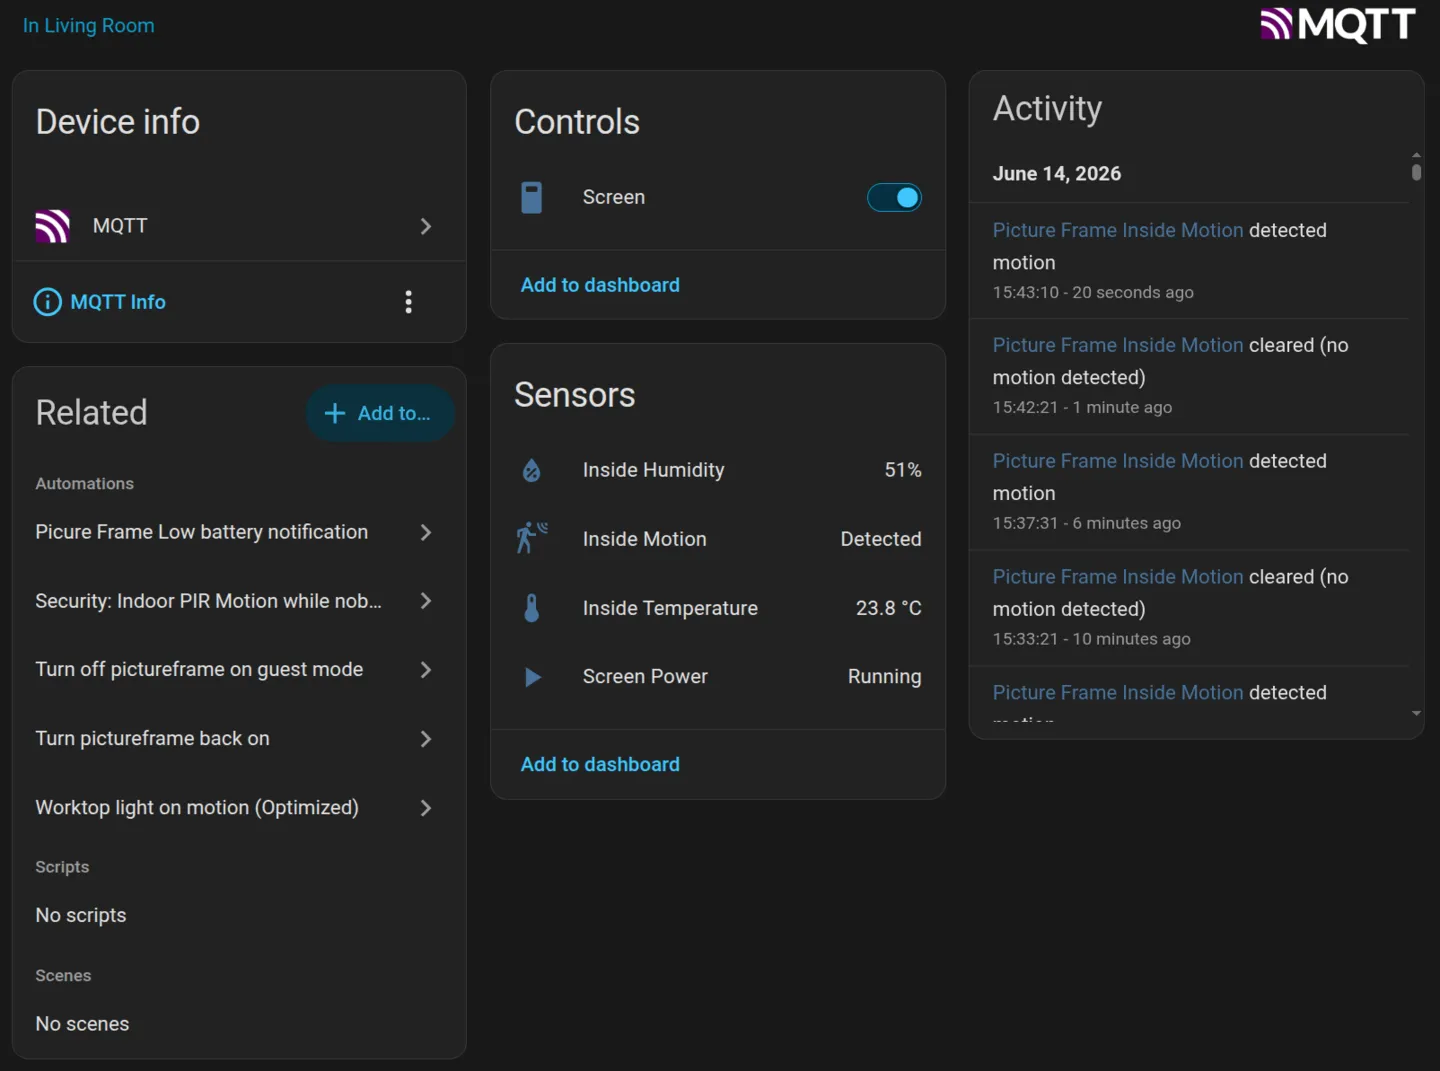
The frame joins Home Assistant as a proper device over MQTT. It publishes its sensor readings and a screen switch to your broker, and Home Assistant discovers them on its own, with no YAML to write. Set it up under Settings → Home Assistant.
What you need
Section titled “What you need”- An MQTT broker on your network, such as the Mosquitto add-on.
- Home Assistant’s MQTT integration with discovery enabled, which is the default.
- At least one Bluetooth sensor if you want readings. The screen switch is published either way.
Connecting to the broker
Section titled “Connecting to the broker”Under Settings → Home Assistant, fill in the connection:
- Broker, as
tcp://orssl://with a host and port, for exampletcp://192.168.1.10:1883. - Client ID, unique to this frame.
- Username and Password, if your broker requires them.
This same broker also feeds MQTT sensors, so it is not tied to Home Assistant, and readings can come from any source on the broker. Once a broker is set, turn on the Home Assistant bridge.
What it exposes
Section titled “What it exposes”With the bridge on, Home Assistant discovers one device, labelled with the Pi’s model and the running frame version, carrying:
- each Bluetooth sensor’s readings, temperature and humidity as sensors, motion as a binary sensor;
- a Screen switch, to turn the panel on or off from Home Assistant;
- a read-only screen-power sensor, showing whether the panel is actually lit;
- Raspberry Pi diagnostics: CPU temperature, memory usage, and uptime sensors, plus an undervoltage problem sensor that flags an inadequate power supply;
- a last touch timestamp, updated when someone taps the frame’s own screen. Clicks in the admin interface don’t count.
Only Bluetooth sensors are bridged. Mock sensors are a development aid, and MQTT sensor readings already come from the broker, so re-publishing them would loop.
The switch reflects intent, not the live panel. Motion and idle blanking move the screen-power sensor but leave the switch alone. Turning the switch on re-enables motion auto-wake. Turning it off forces the screen off and holds it there. With no motion sensor, it is a plain on-and-off. See Slideshow & display.
Bridge settings
Section titled “Bridge settings”- Node ID is the device’s identity in Home Assistant, its device id and the prefix for every entity. Give each frame a distinct value if you run more than one.
- Base topic namespaces the state, command, and availability topics.
- Discovery prefix must match Home Assistant’s MQTT discovery prefix,
homeassistantby default. - Stale after marks a sensor unavailable in Home Assistant when no reading arrives within the window. An entity shows as available only while both the frame and that sensor are online, so a dead frame and a silent sensor both surface honestly instead of leaving a stale value looking live.
Using it
Section titled “Using it”The device appears under Settings → Devices & services → MQTT in Home Assistant. From there you can add its entities to dashboards, or fold them into automations: blank the screen when you leave, wake it when you are back, or use the frame’s motion and climate readings elsewhere in your home.
Alongside the screen switch and the sensors you configured, the bridge publishes a last touch timestamp, and the frame’s own diagnostics: CPU temperature, memory use, uptime, hostname, IP address, and undervoltage on Pi hardware. Version, model, and board revision appear on the device card itself.
Reboot and shutdown
Section titled “Reboot and shutdown”The frame can also expose two buttons that act on the Raspberry Pi itself:
| Button | What it does |
|---|---|
| Reboot | Restarts the whole device. Photos resume once it is back, usually within a minute. |
| Shutdown | Powers the device off. It stays off until someone powers it on again. |
Both are ordinary Home Assistant buttons, so an automation can call them: power the frame down while you are away, or reboot it on a schedule.
Home Assistant fires a button the instant it is pressed, with no confirmation. The same two controls sit on the admin dashboard’s System card, where they ask first.
Every setting on this page maps to a key in the configuration reference.