Install
One command installs the frame on a fresh Raspberry Pi and provisions the whole device. Make sure your Pi meets the requirements first. In short: Raspberry Pi OS Trixie Lite, on the network, reachable over SSH.
Run the installer
Section titled “Run the installer”On the Pi (over SSH or at the console):
curl -fsSL https://github.com/MateEke/picture-frame/releases/latest/download/install.sh | sudo bashThat’s the whole thing. The installer:
- detects the CPU architecture and downloads the matching release, verifying it with a minisign signature and a SHA-256 checksum
- installs the system packages and sets up the kiosk: the compositor, the browser, the background service, the hostname, and the HDMI output
- seeds a
config.tomlwith sensible defaults - optionally configures a Wi-Fi recovery hotspot and an admin password
It’s safe to re-run: it re-applies the system setup but never overwrites an existing
config.toml.
What it asks
Section titled “What it asks”Unless you pass everything as flags, the installer prompts for three things. Each has a safe default, so you can press Enter through all of them.
- A Wi-Fi recovery hotspot. If you enable it, the frame raises its own access point when it can’t reach your network, so you can reconnect it from your phone if you move it or change your Wi-Fi, without digging out a keyboard. You choose the network name and an optional password.
- An admin password. Protects the web interface. Leave it blank to run unprotected on your home network, or set one and you’ll sign in on first visit. You can change this any time from the admin interface.
- Automatic OS security updates. On by default. It enables Debian’s security updates only, and never reboots on its own.
When it finishes, it offers to reboot. The HDMI output is pinned during install, so a reboot is needed to apply it:
sudo rebootFirst look
Section titled “First look”After the reboot, the frame starts on its own. It has no photos yet, so the screen shows just the clock and date until you add some.
To add photos and finish setting up, open the admin interface. Browse to your Pi’s hostname from any device on the network. The installer sets a unique hostname derived from the Pi’s Wi-Fi MAC, shown at the end of the install:
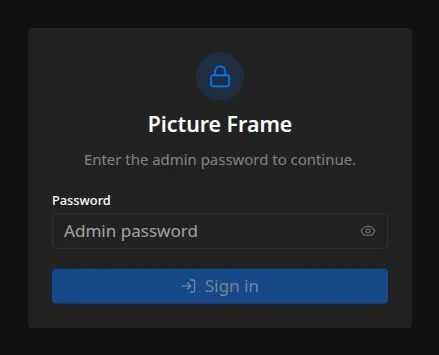
http://pictureframe-XXXX.localIf you set an admin password, you’ll be asked to sign in:
From there you can add photos, configure sensors, connect Home Assistant, and adjust how the frame looks. The User Manual walks through each part, and the configuration basics cover where settings live and how they’re applied.
Options
Section titled “Options”The installer takes flags for unattended or customized setups. A few of the common ones:
| Flag | Purpose |
|---|---|
--display-backend wlopm|vcgencmd | Screen-power backend. wlopm (default) is recommended, but vcgencmd is a lighter legacy fallback. See Slideshow & display. |
--ssid <name> / --ap-password <pw> / --no-ap | Configure or disable the Wi-Fi recovery hotspot. |
--app-password <pw> | Set the admin password non-interactively. |
--no-unattended-upgrades | Skip enabling automatic OS security updates. |
--version <tag> | Install a specific release instead of the latest. |
--non-interactive, --yes | Never prompt. Use flags and defaults only. |
--dry-run | Print every action without making changes. |
--uninstall | Reverse an install, leaving config.toml and photos in place. |
A fully unattended install looks like:
curl -fsSL https://github.com/MateEke/picture-frame/releases/latest/download/install.sh \ | sudo bash -s -- --yes --app-password 'choose-something' --ssid 'Frame-Setup'Run install.sh --help for the complete list.